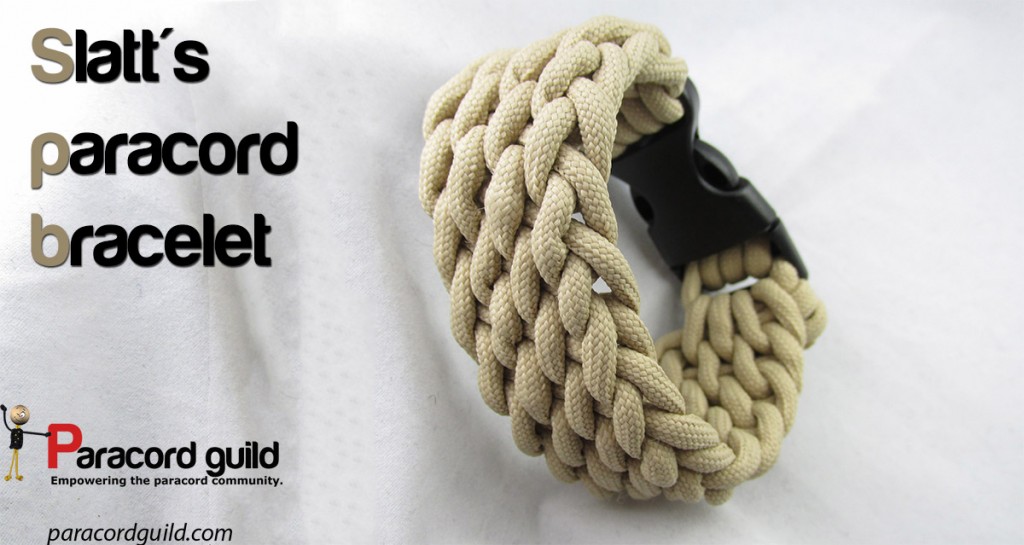
This tutorial is dedicated to the variation of the Slatts rescue belt which results in a quick deploy bracelet.
The Slatts rescue knot is one of my favorite techniques for making paracord belts (see my paracord belt tutorial). The technique can easily be applied to a smaller buckle to make a bracelet as well. The benefits of using this way of making a paracord bracelet is that you get quite a bit of cord that can be used in a quick deploy fashion. The whole bracelet unravels extremely quickly, making it perfect for survival scenarios.
What I also like is the fact that this bracelet turns out well even without using a bracelet jig. You can determine the width easily as well by increasing or decreasing the starting loops (as will be shown later on in the tutorial).
- Difficulty: medium
- Cord storage: medium/large
- Child friendly: no
The supplies needed to make the bracelet
To make this type of bracelet you generally only need the following:
- paracord 550
- a bracelet buckle, the wider it is, the more cord the bracelet will hold, but the bracelet will also be wider because of it
- optionally a marlin spike or lacing needle to form loops easier
- lighter, scissors

The Slatts paracord bracelet tutorial
The bracelet is made by taking one end of the paracord and wrapping one side of the buckle with it. The end is then tucked into the loops that were formed when wrapping the buckle. By doing this we have now attacked the buckle.
We continue by loosening up the loops a bit. We form a bight with our working cord (as seen in the images below) and tuck it into the loosened loops. We then take a marlin spike or lacing needle and use it to pull out the cord to make a new set of loops. This set of loops is then twisted in a way that the cord that is closer to the working end is facing you (see the images). We then form another bight and pull it through the loops.
We continue this process of making loops and pulling bights through them until we reach a proper length that would fit your wrist. At that point simply attach a buckle, cut the cord and melt the end.
There are a few ways of attaching the buckle at the end. The way I show in the tutorial is done to allow for easy buckle removal in case you need the cord.
A big part of making this bracelet is the tightening process. After I tuck in a bight I go from left to right and tighten every loop and then pull the bottom cord of the bight to remove the slack that has formed from tightening the loops. This is the key for making a consistent bracelet as far as I have observed.
To secure the ends of the cord I often make an overhand knot. This knot is used to make sure the cord does not slip and unravel the bracelet.


May not be very manly, but a crochet hook is really the ideal tool for this.
Hey!
If it gets the job done, it is a shame to discriminate!
Mark
Thanks for the tip. Borrowed a hook from my girlfriend, works great. Pulling the loops and tucking the bight become one smooth motion.
I agree, a crochet hook would be a much better tool, especially for this bracelet. I use a crochet hook when making things with paracord.
I use a Marlin Spike, but each to his own,
(Read: I never thought of a crochet needle)
Prefer this knot over ANY other knot for survival bracelet
It deploys quicker than any other
It is a single strand unravel, so you only have to unwind as much cord as you need
Other bracelet knots are purely decorative and not very functional at all (I hate those macrame survival bracelet)
They are difficult to undo, and most have two running strands, so you have to unravel twice as much cord as you actually require….
In an emergency, if you need it out quick you can slice the male end (you’llonly lose 2″<3" max) but you will be able to unravel the entire length of cord in under 10 seconds (tested in proven, I can do it in 6!)