In this tutorial I show you how to do the chain stitch.
This is another useful stitch you can use to decorate your paracord bracelets.

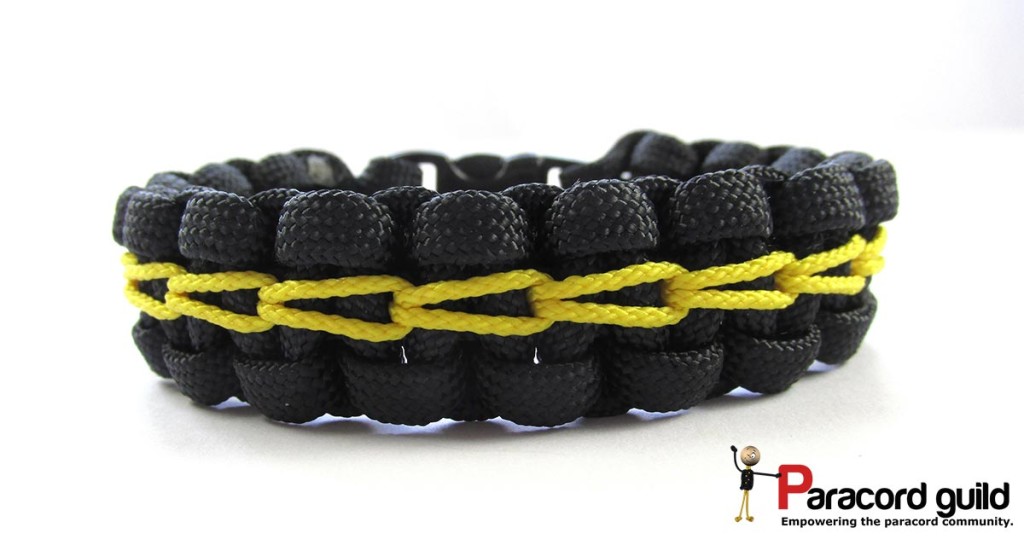
The chain stitch originates from embroidery. I have adapted it to fit onto a paracord bracelet, which gives it a nice look.
I am going to demonstrate the stitch on the regular cobra knot bracelet, but you can use some other bracelet designs as well.
There is a slight variation in the chain stitch that you can make. If you take a look at the patterns below, you can see a small difference.

Regular chain stitch. With an over one at the top.

A longer chain stitch with an over two at the top.
More on these stitching patterns later.
So let’s jump right into it!
The supplies
You will need the following:
- a tied paracord bracelet. I recommend the cobra knot bracelet
- a lacing needle
- microcord (I used up about 4.5 feet for a 6 inch weave)
- lighter
- scissors.
With these supplies ready, let’s start stitching.
The tutorial

Tie a cobra knot bracelet.

Secure your microcord on the bottom of the bracelet.

Come to the top.

Then back down to the underside.

Move down one space and back to the top (for a longer chain stitch move down two spaces).

The top view.

We now start our chain stitch by going under the previous stitch we set up.

Then back down to the underside of the bracelet.

And one chain stitch is complete. Let’s do another one for good measure.

On the underside go down one and go up to the top side.

Top view.

Go under your previous stitch.

And back down.

Second stitch complete!
Continue the same way to the bottom. Finally tuck in the end like we did at the start and your stitching is complete.
If it looks uneven, you can tighten it.
A video tutorial should also prove useful:
I hope this tutorial proved useful.
Enjoy your stitching!


